Cookie
Electronic Team uses cookies to personalize your experience on our website. By continuing to use this site, you agree to our cookie policy. Click here to learn more.

How to Deinterlace Video with Elmedia

If you’ve ever noticed ugly horizontal lines or blurry edges around objects while watching a video - giving it a pixelated look, then what you’re seeing is most likely an interlaced video. And the only way to solve this problem is by deinterlacing that video. In this article, we’ll go through a brief overview of what interlaced video is, interlaced vs. progressive scans, and how you can deinterlace video easily and without much effort at all.

Top choice
Elmedia Player Free
4.5 Rank based on 119503+ users, Reviews(11950)
 Best Video Player for Mac

Interlaced Vs. Progressive - What’s the Difference?

The two most common forms of scanning used in general media and broadcasting as a whole are interlaced scanning and progressive scanning. There are similarities between the two but also, quite significant differences that are important to keep note of. Things like efficiency, video quality, combing effect, and so on. As a general rule, at first glance, when you see an "i" after the video source (1080i), this indicates an interlaced video. And when you see a "p" after the video source (1080p), this indicates a progressive scan.

Interlaced Vs. Progressive

Interlaced Video - What You Should Know

At the core, interlaced video is essentially a means of video compression - a method of doubling the frame rate of a video without taking up too much additional bandwidth and data. This resulted in a smoother, end result.

The interlaced video would have scan lines that would appear as two separate fields. The alternating scan lines would come on the screen as one frame of the video and come up at slightly different times. In the end, interlaced video produces a better quality video, but falls short in other aspects like fast-motion videos, for example.

Progressive Video - What You Should Know

Progressive video is a type of scanned video that produces the entire picture in a sequence, as opposed to interlaced videos that alternate between even and odd lines. It still generates the same horizontal lines as interlaced video but a progressive scan sends as much as twice the data that the interlaced video signal sends. When you compare the two side by side, you’ll be able to realize that progressive video provides a better, more realistic picture as opposed to the interlaced video. Although there is a downfall that progressive video tends to be more costly to produce.

What is Deinterlacing Video All About?

Deinterlacing video is a process that takes interlaced video and converts it into a non-interlaced form, resulting in displaying a full picture at a time, rather than half at a time. Thankfully, there is a wide range of deinterlace software available that can solve any of those jaggedy lines, unwanted blurriness, and combing-effect that comes with interlaced video.

Deinterlacing will take every other line from each field and essentially blends the two together to create a more coherent picture without tearing or separation. There are a few different methods used to deinterlace video - by combining or extending fields, or by incorporating both as the same time for the smoothest effect.

Thankfully, now we have much more advanced technology at our disposal that can do all the heavy lifting for us. Elmedia Player PRO is the perfect example. It’s one of the best deinterlacing softwares that can convert any interlaced video and make it perfect.

Elmedia Player offers a capable deinterlace feature in the PRO version of the app. You can enable this in the player’s Preferences menu. To deinterlace video, this Mac video player uses Yadif video filter and checks the pixels of previous, current, and future frames to fill in gaps of the missing fields from the interlaced video using edge-directed interpolation.

Video Deinterlacing

How to Deinterlace Video with Elmedia Player PRO

1. Download Elmedia’s latest version onto your Mac.

Installing Elmedia Player

2. Open Elmedia Player PRO. (Copy and paste the activation code that was emailed to you when you purchased the PRO version). Paste the code into Elmedia Player’s settings and press OK. The activation takes effect immediately and automatically with no need to reboot or restart your Mac.

3. Choose the video you want to deinterlace and open the file in Elmedia Player.

Open video file on Mac with Elmedia

4. In Preferences, choose video and then "Deinterlace method" and turn it on.

Although Elmedia Player’s deinterlacing feature is quite spot on in creating solid results, it’s not going to be perfect - because it’s nearly impossible for a software to create perfect results. Rather, the video will be deinterlaced enough to be enjoyed by the majority of users, without any issues whatsoever.

Deinterlace video with Elmedia

Common Deinterlace Methods and Actions Behind the Scenes

Disabled

No deinterlacing is provided. Everything is left as it is. It’s used for PsF content.

Blending

It’s somewhat a mixture of odd and even lines. With blending, the lines are not displayed at different times.

Bob

This filter doubles lines and displays each part as a full frame. It keeps the temporal resolution that the interlaced video had.

Discarding

With the discarding method, only one of the half-frames is exposed and the other one is left behind. The interlaced resolutions get cut in halves. This filter is great for slow computers. It also gives interlaced videos a movie-like look with judder.

Linear

It’s a combination of Bob and linear interpolation. Each line is not doubled but is made as the average of the previous and next coming lines.

Mean

This filter illustrates a half-frame that was made as the average of 2 original half-frames.

X

It creates a full image by using the odd lines from the odd half-frame. The even lines appear with the help of a complicated algorithm that takes data from both half-frames.

Yadif (v1.1.0+)

The filter makes a full image of the odd lines taken from the odd half-frame. It creates the even lines via a complicated algorithm that uses temporal as well as spatial interpolation.

Yadif (2x) (v1.1.0+)

It’s a mix of Bob and Yadif interpolation.

Phosphor (v1.2.0+)

Phosphor displays the latest 2 half-frames. The old one fades out. This fade effect can be easily configured.

IVTC (v1.2.0+)

IVTC is an abbreviation for inverse telecine. The filter deletes telecine from NTSC telecined video in real time. As a result, the progressive signal is restored without losses.

logo Elmedia player
#1 at Video
Elmedia Player Free
Get a download link for Desktop
Submit your email address to get link for quick download and get started!
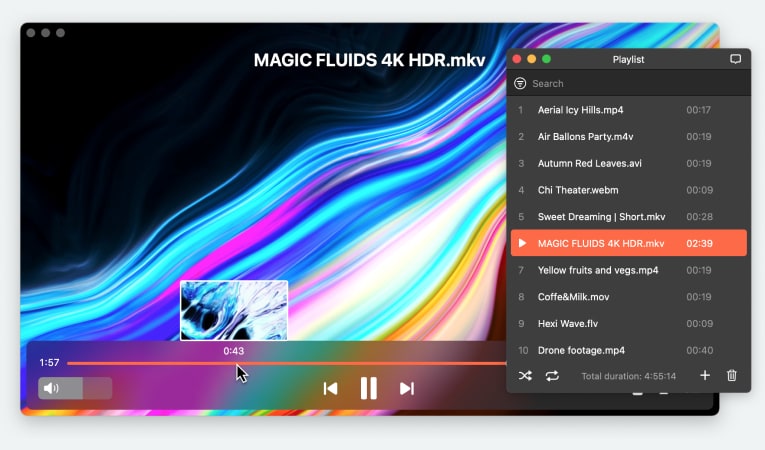
or