VLC Media Player is undoubtedly one of the most user-friendly players on the market, but when it comes to subtitles, it’s very common to run into problems. This can be frustrating if you need subtitles to follow the dialogue or if you’re watching something in a different language.
There are many reasons behind the VLC subtitles not working issue. Oftentimes, it’s because the file is corrupted and you simply have to re-download it.
In this article, we’ll explain all the possible reasons behind the VLC subtitles not showing problem and what you can do to fix it. Despite being a user-friendly media player, VLC can be a bit tricky sometimes and it’s easy to run into a lot of problems.
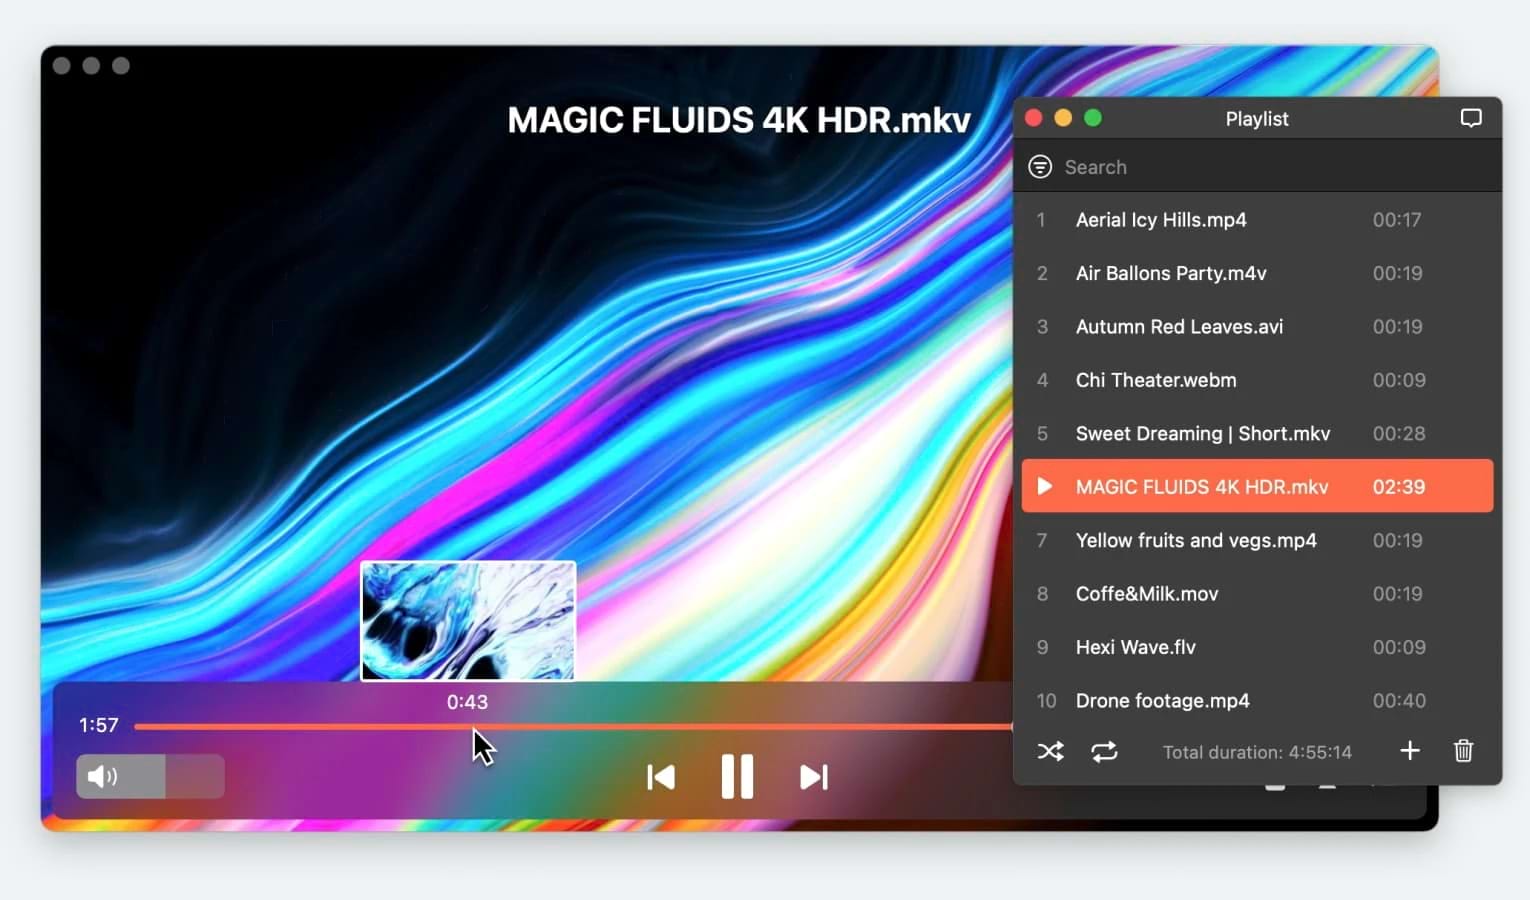
If that sounds like you, then we recommend trying a different media player, such as Elmedia as it’s better optimized for macOS and has more features. We’ve explained these features below.
Solution 1: Subtitle File is Corrupted or Empty
Subtitle files can become corrupted if they’re not downloaded properly.
The best solution is just to redownload the file and make sure your Internet doesn’t cause any problems while the file is downloading.
If you download a subtitle file while experiencing network issues, it’ll either end up being damaged or be downloaded as an empty file.
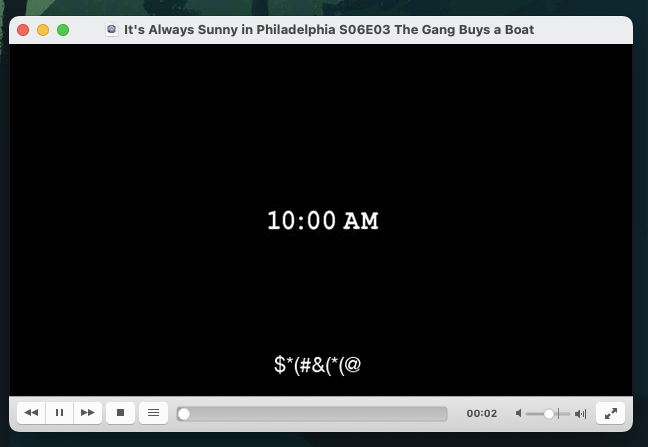
In either case, you won’t be able to see subtitle text in VLC, and sometimes it’ll just appear as gibberish
Solution 2: The Subtitle File Should Match Videos' Filename
VLC player often automatically locates subtitle files if their names match the video files’ names. If the SRT file title differs from the video file name and they’re located in separate folders, VLC won’t be able to display the subtitles.
To fix this problem, just rename the subtitle file and make sure it matches the name of the video. For example, if the name of the video file is “movie1.avi,” the name of the subtitle file should be “movie1.srt”.
Solution 3: VLC Subtitle File Format is Incompatible
VLC is quite versatile when it comes to subtitles. It supports various formats, including SRT, ASS, and SSA, but some may not work properly.
If the VLC not showing subtitles problem is happening because the file is in an incompatible format, then we recommend re-downloading it in the correct format that’s supported by VLC.
Solution 4: Convert the SRT File to UTF-8
You have to make sure the subtitle file with the SRT extension is encoded in UTF-8. Here’s how you can check:
1. Make a secondary click on Mac on the SRT file and open it with Notepad or TextEdit.
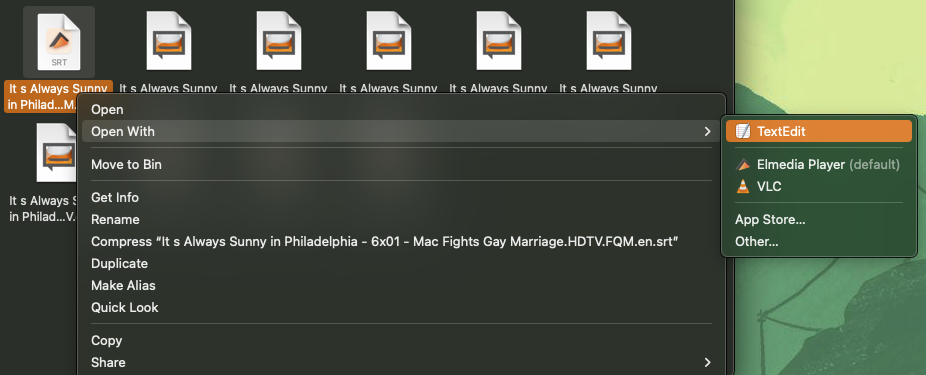
2. If you see strange characters and symbols, it usually means the SRT file wasn’t encoded in UTF-8.
3. Open any online UTF-8 converter. For this guide, we’ll use Subtitle Tools.
4. Upload your SRT file.
5. Click on Convert to UTF-8.
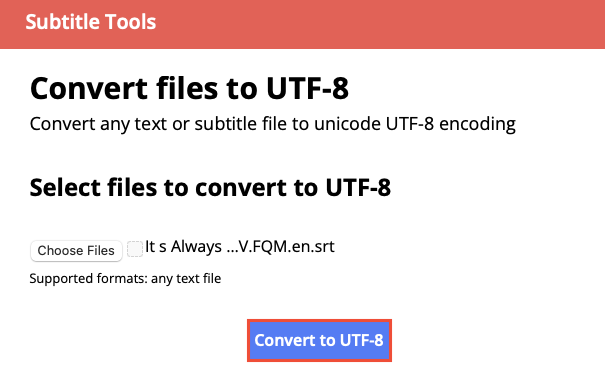
6. Once it’s finished converting, download and save it in the same folder as the video.
Solution 5: Load a Subtitle File Manually to VLC Player
In case VLC can’t load the subtitle file, and you’re not in the mood to rename it, there’s a way to open it manually in the player. Here’s how:
1. Play your video in VLC.
2. In the menu bar, go to Subtitles > Add Subtitle File.
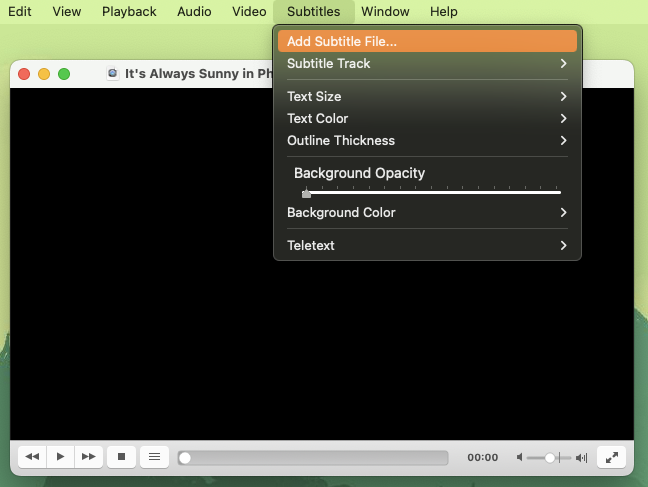
3. Locate and highlight the subtitle file, and click on Open.
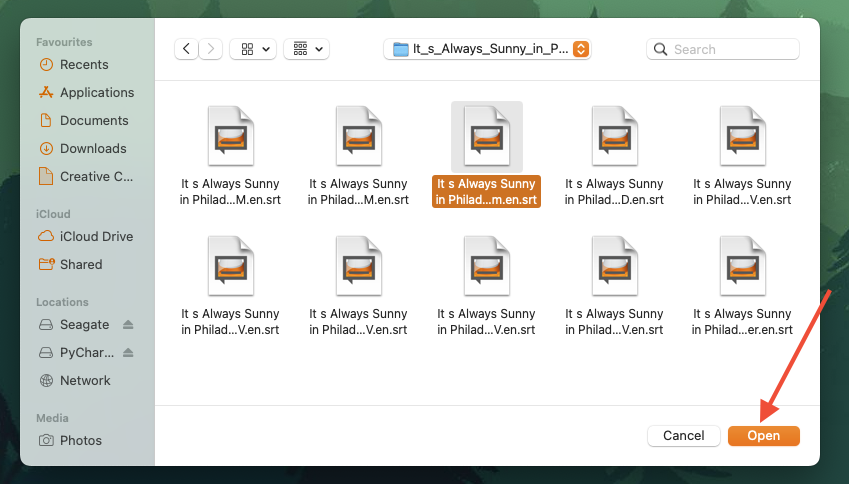
Solution 6: Disable and Enable Subtitles Again
VLC not displaying subtitles often happens if you’ve accidentally disabled them in the settings. Here’s how you can change it:
1. Play any movie in VLC.
2. Click VLC Media Player in the menu bar and go to Preferences > Subtitles/OSD.
3. Check the box next to “Enable OSD.”
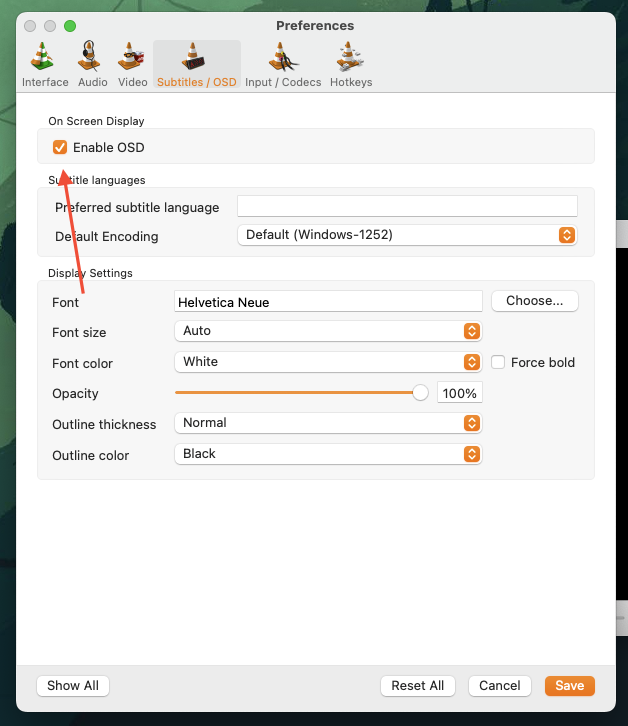
4. Click on Show All to see more advanced options, and go to Video > Subtitles/OSD.
5. In the field next to “Force subtitle position,” enter 0.
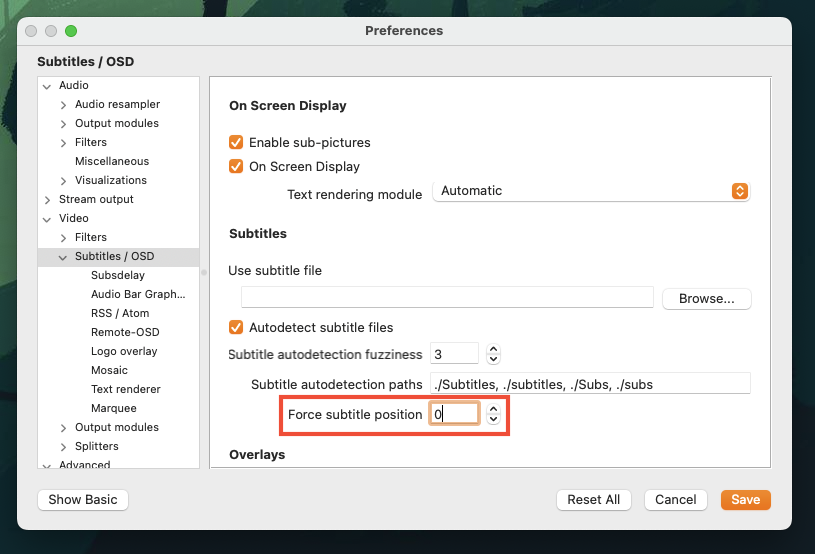
6. Click on Save.
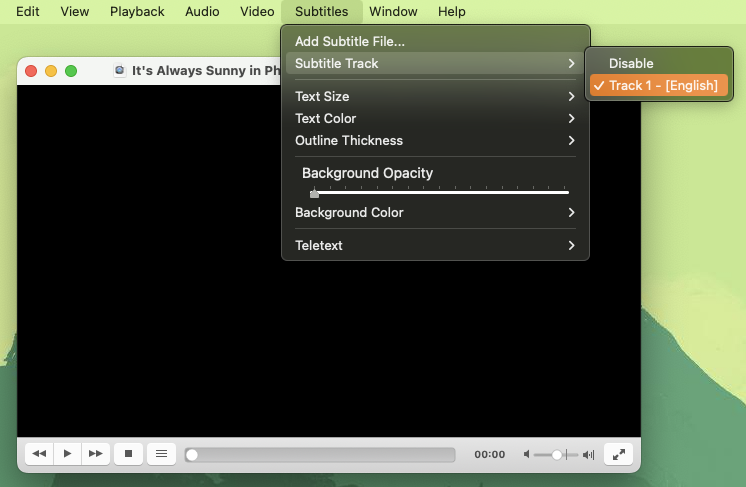
7. After you’ve added the subtitle file, click on Subtitles in the menu bar.
8. Click on Subtitles Track and make sure the subtitle file is selected.
Solution 7: Reset VLC Player
If nothing works, your last resort should be to reset the application.
1. Click on VLC Media Player in the menu bar and go to Preferences.
2. Click on Reset All.
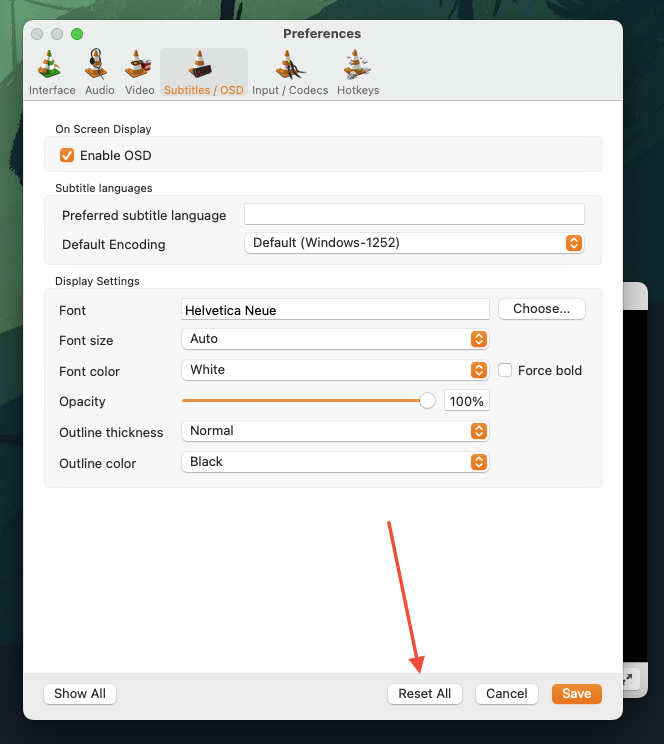
3. A confirmation box will pop up. Click on Continue.
Don’t forget to add subtitles in VLC manually after it restarts!
Solution 8: Update VLC to the Latest Version
1. Open the VLC app.
2. In the menu bar, click on VLC media player and then Check for Update.
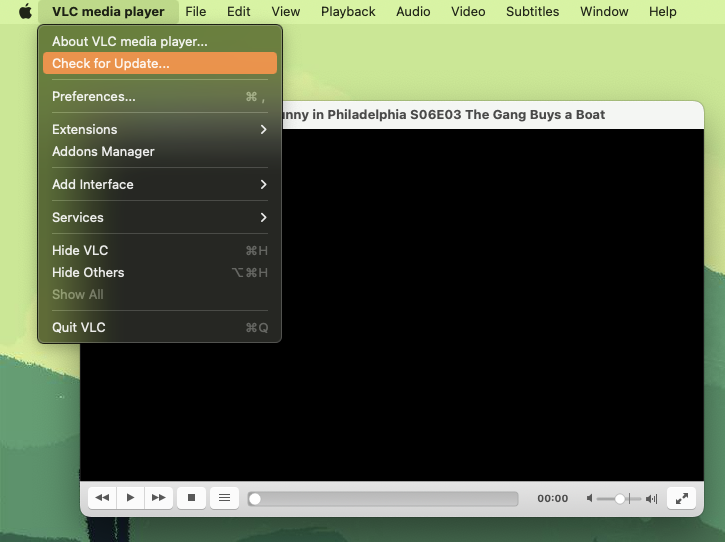
3. If there are any updates available, it’ll ask you to download them. If not, you’ll get a message saying you’re up-to-date. Click on OK.
Updating to the latest version will help if VLC subtitles are not working. Make sure you add subtitles in the VLC’s subtitle settings after you’re done updating. If the names of the subtitle and videos are the same, VLC will automatically load them.
Solution 9: Try Subtitles Download Sites
If the subtitled video still refuses to work after you’ve tried every solution, it’s time to download a different subtitle file. There are many subtitle download sites where you can easily find files for any video.
OpenSubtitles is a popular site that lets you download subtitles for free. If the file works, then you’ll know for certain that the previous file was corrupted or damaged, and there’s nothing wrong with the VLC software.
Solution 10: Try Elmedia Video Player
It’s true that there are many solutions available for VLC subtitles issues. But how much better would it be if you didn’t have to go through all those fixes at all?
That’s where Elmedia Player comes in. You don’t have to download new updates, missing codecs, or files in the correct format to make things work.
Elmedia Player automatically does everything for you and doesn’t require any tinkering and tweaking.
Enabling Subtitles in Elmedia Player
Elmedia Player supports almost every subtitle file format, making it quite easy to add subtitles.
Here’s how you can add or download subtitles in Elmedia Player for any video and movie:
1. Play any video in Elmedia Player.
2. In the menu bar, go to Subtitles > Subtitle Tracks > Add from File.
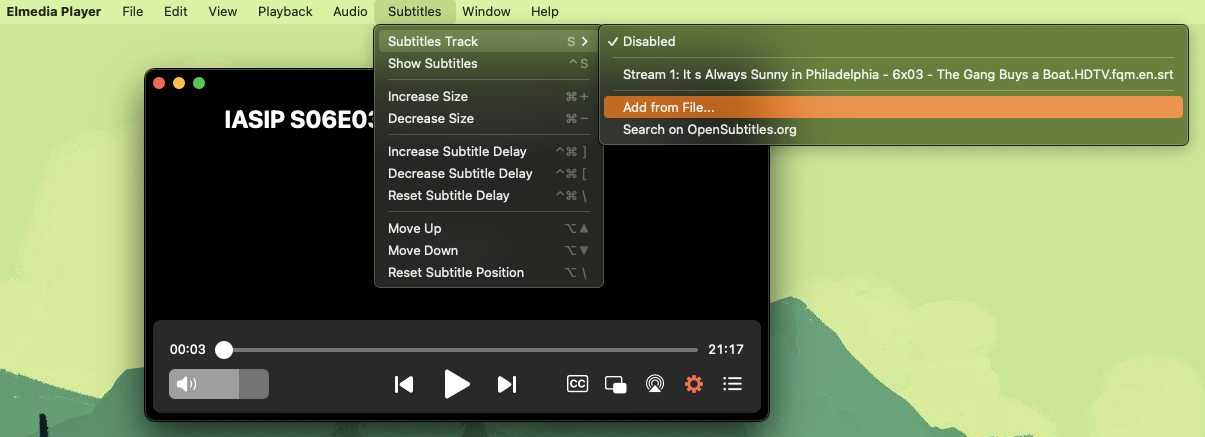
3. Locate and highlight the subtitle file and click on Open.
4. If you don’t have a subtitle file downloaded, go to Subtitles > Subtitle Tracks > Search on OpenSubtitles.com in the menu bar of Elmedia Player.
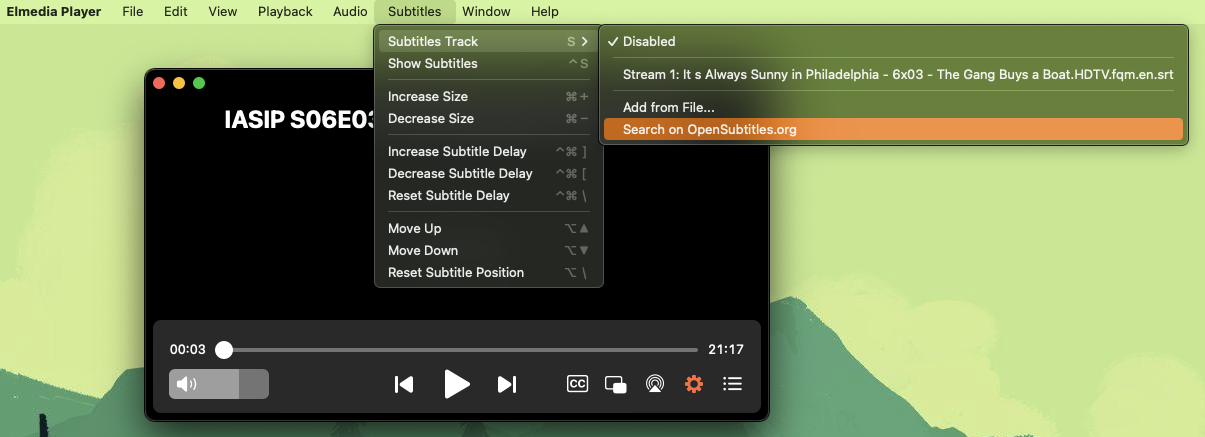
5. Wait for a few seconds and then open the drop-down menu again. If the player has found any subtitle files, you’ll be able to see them there.
6. Simply click on any subtitle file and start enjoying your video!
Why are Subtitles Not Showing in VLC and Not Working Correctly?
A corrupted or incompatible subtitle file is one of the most common reasons you can’t get subtitles to work on VLC. There are many more, though, and before we start fixing things, it’s important to know why they might not be working as expected.
It’s common to see users complaining about VLC subtitles on the VideoLAN Forum.
Let’s take a more detailed look at some of the most common reasons why subtitles won’t show or work in VLC:
- Corrupted subtitle file – If you couldn’t download the file properly due to network issues, it may be corrupted or damaged.
- The subtitle’s file name doesn’t match the video’s – If the subtitle file is named incorrectly or doesn’t have the same name as the video file, VLC may not be able to automatically locate it for you.
- Subtitles are disabled in the settings – Sometimes, subtitles will be disabled in the VLC settings, preventing them from showing in the video.
- Subtitle doesn’t use UTF-8 encoding – UTF-8 is the most commonly used encoding for subtitles, and if your subtitle file doesn’t use it, it may not work properly.
- VLC may be experiencing bugs – VLC is prone to bugs which can sometimes affect how it shows subtitles.
- The VLC version is outdated – If the version of your VLC player is outdated, it may not be able to support the latest subtitle formats or have unresolved bugs.
Conclusion
As you can tell, there are plenty of methods you can use when subtitles don’t show up on VLC player. From redownloading the file to make sure it’s not corrupted, to updating the media player to the latest version, there are various ways to troubleshoot and resolve the issue. Using a different media application such as Elmedia should quickly fix any problem you’re having.
Want to watch videos on your Mac without running into subtitle issues? Learn more about how powerful Elmedia is when it comes to subtitles, and install it today!
Frequently Asked Questions
SRT files may not work in VLC if they’re corrupted or damaged. You’ll also have to make sure that they’re encoded in UTF-8. If you don’t want to deal with subtitle problems, we recommend downloading Elmedia Player, as it lets you download subtitle files from within the player.
You can make subtitles visible in VLC by manually enabling them in the settings. Open the preferences, and in the “Subtitles/OSD” section, click on the box next to “Enable OSD.” In Elmedia Player, subtitles will be enabled by default.
Elmedia is capable of automatically detecting the encoding of the subtitles. You can also use it to change the font, size, and color of the subtitles. It also lets you change the font for the subtitles that appear on a Chromecast device.
One of the simplest techniques is to rename the subtitle file to match the video file. By ensuring both files have identical names, you can ensure that VLC detects them simultaneously and allows the option to add subtitles through the subtitle menu.
To turn off subtitles in VLC, follow the steps:
- Open your video.
- Click the “Video” menu.
- Open the “Subtitles Track” menu.
- Choose “Disable”.
- Disable all subtitles by default.

Users situation: